
over the years i have collected a lot of 3-ring binders. to update them a bit (and to get rid of the vinyl covers) i have been giving them a makeover.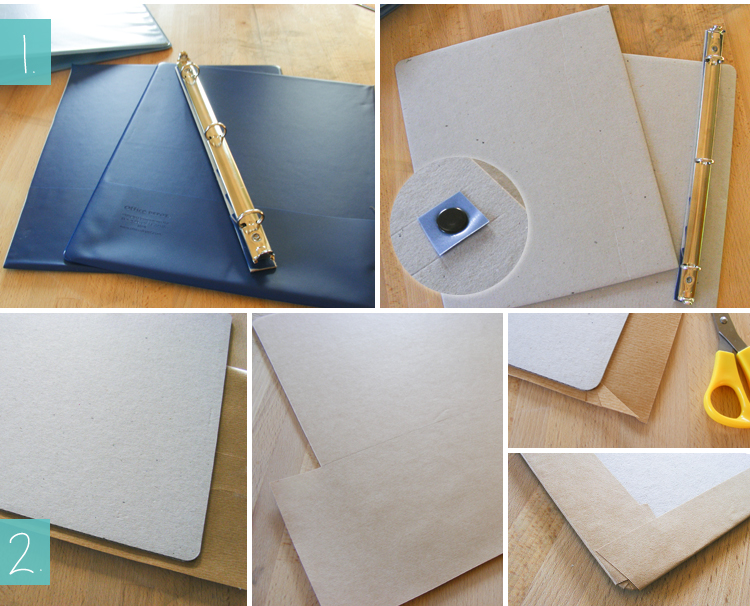
1. first take apart the binder. a craft knife or utility knife works for me, but you can use scissors. cut the binder on both sides of the spine. then carefully cut a slit in the vinyl on each piece and get out the book binding board that is inside. be careful not to cut the board, you will be reusing it. depending on the type of binder you have, the screws for the ring mechanism will either be on the spine or on the back. take as much of the vinyl off around the screws as you can – making sure not to bend the board.
2. now cover the front and back with the label paper. my labels are not large enough, so i use a sheet and a half. leave some of the board visible on the edge that meets the spine. wrap the labels around to the inside.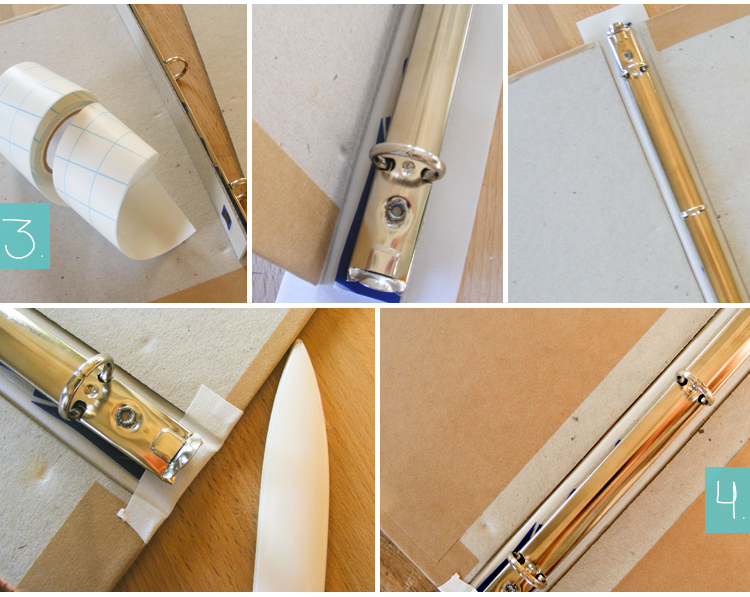
3. for the spine you are going to need book binding tape (i use filmoplast t tape). it is important to use this kind of tape. it will allow you to be able to open and close the binder time and time again without ripping or wearing. you can get rolls at talas online or somewhere that sells book binding supplies. if you can’t find it, the alternative is to use a piece of book cloth and pva glue.
cut three pieces of the tape – one a little longer than the spine and then two slightly shorter. center the spine on the longer piece of tape. take the cover of the binder and place it next to the spine. you want to leave some space in-between – at least as thick as the board. fold the cover up to make sure that there is enough clearance for the rings. do the same with the back board. flip over the binder and press the tape with a bone folder. do the same on the inside – making sure to get the tape in the space between the boards.
4. cover the insides of the covers with another label sheet. don’t worry if it doesn’t meet the spine.
5. take the shorter pieces of the tape and place one on each side of the spine board and cover boards. take the bone folder and make sure to get the tape down inside the space between the boards. that’s it – a new and improved binder.
i like the simplicity of kraft paper with white, so that is what i have been using. you can get full sheet labels at office supply stores and print a pattern, photos or an inspirational quote on them.
other options are paper, book cloth, wall paper, washi tape, gift wrap … the possibilities are endless. if you are going to go with an option that doesn’t already have an adhesive you will want to use a pva glue. it is a book binding glue. regular glue might warp the board or rip the paper.
happy organizing!